Changing a material's color like a transition, not a cut
· 3 min read · three.js, react-three-fiber, shaders, glsl, configurator
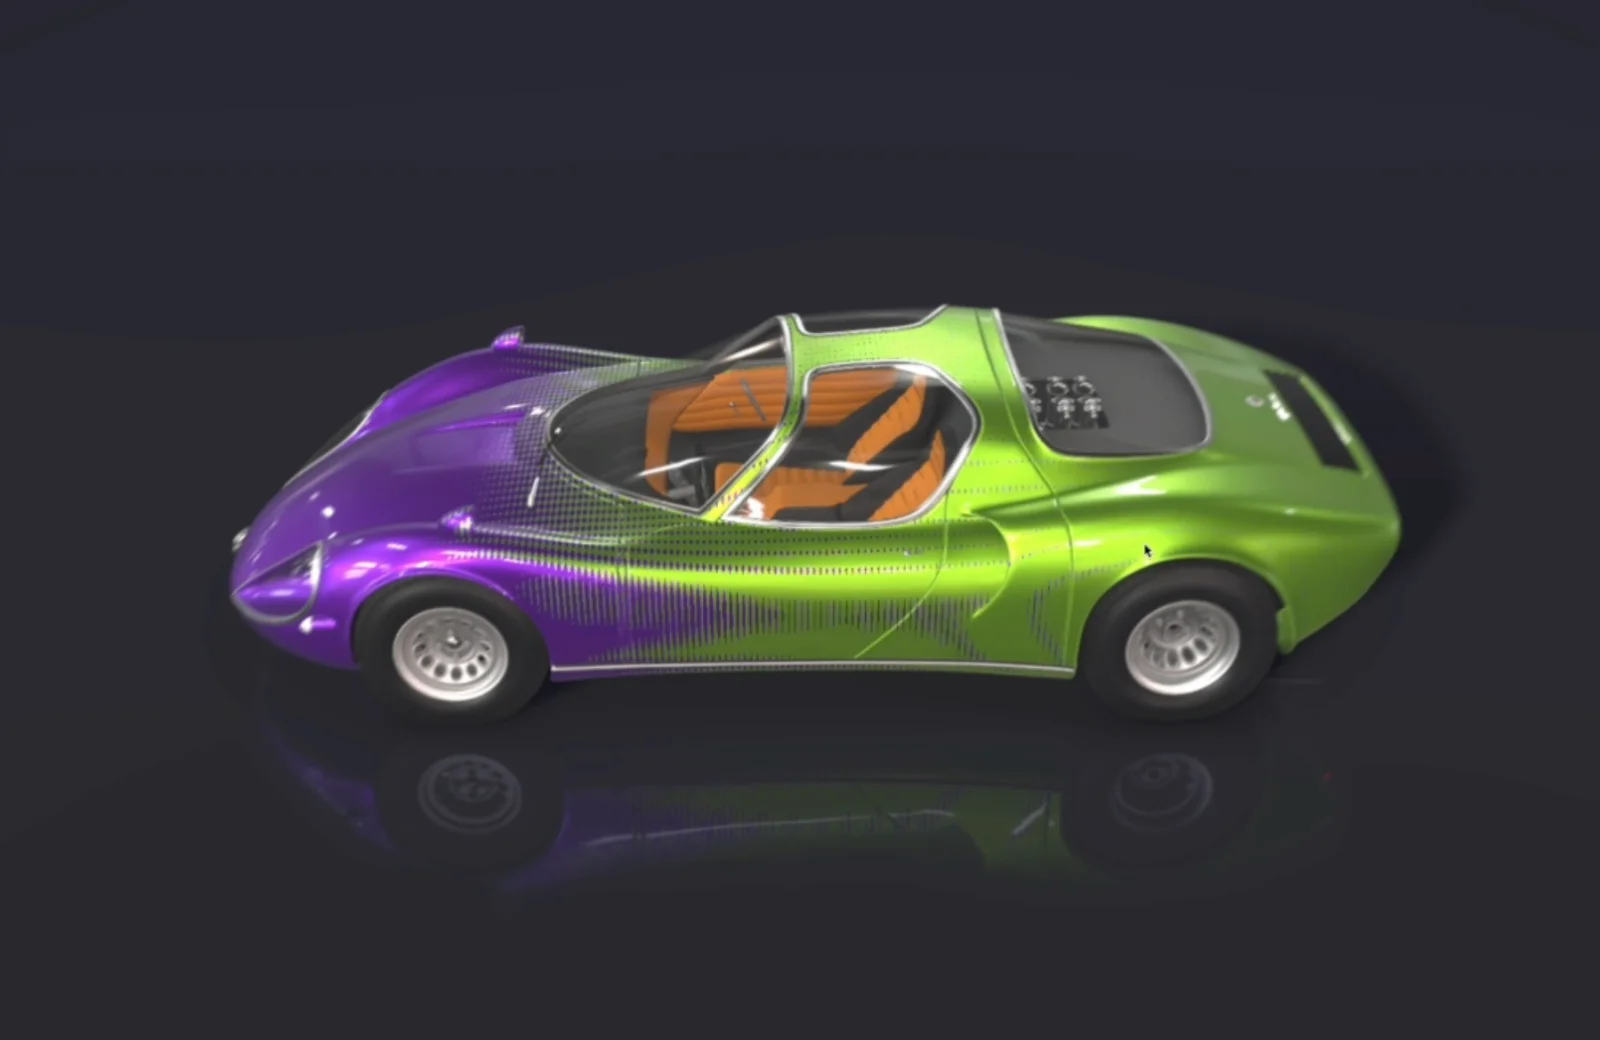
In a product configurator, the most common interaction is also the plainest one: the person clicks a color and the color changes. Changing a material's color in the next frame is correct, and it feels like nothing happened. The change is hard to follow, and it does not feel like the product is being made for you.
The mesh transition material is a small replacement material for React Three Fiber that turns that change into a short transition: when the color prop changes, the new color spreads over the surface instead of replacing the old one. I used it in Classics Garage, a classic car configurator, and this post explains how it works.
Using it #
<mesh>
  <boxGeometry />
  <TransitionMaterial1 transitionColor={"red"} />
</mesh>
You change the transitionColor prop, and the material reads the previous color and goes to the new one. The rest of the props go to a MeshPhysicalMaterial, so roughness, metalness, clearcoat and the maps behave as usual.
A physical material with a custom fragment #
The material is not written from scratch. It uses three-custom-shader-material to keep a MeshPhysicalMaterial as the base, and replaces only one thing in it: the diffuse color. The lighting, reflections, clearcoat and shadows are still the standard PBR pipeline, which is what makes a car's paint look right.
The shader only has two jobs: decide, for each pixel, whether it still shows the previous color or already shows the new one, and multiply the base color by the result.
The state is a handful of uniforms: uProgress, prevColor, newColor and the resolution. When transitionColor changes, the component sets newColor, resets a timer and raises uProgress from 0 to 1 in less than a second. When the transition ends, prevColor takes the value of newColor, so the next change starts from where this one ended.
Three ways to spread a color #
The three variants differ only in how the mask is computed.
1. A grid of diamonds. The model's UVs are divided into a grid of 60 by 60 cells. Inside each cell, a diamond grows with the progress: pixels inside it show the new color, and the others keep the old one. The diamonds start at different moments depending on where they are, so the new color seems to arrive from one side. It is based on a Shadertoy by another author.
2. A circle. The mask is the distance to a circle, smoothed, in screen coordinates. The new color opens like an iris from the center and the circle grows with the progress.
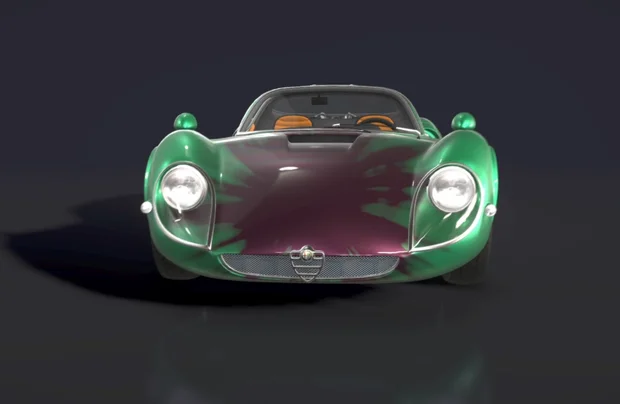
3. An ink stain. The same radial idea, but the angle is perturbed by fractal noise (fbm) and the edge is eroded by a second, finer noise, so the stain has an organic, irregular border, like ink spreading through paper.
A detail that matters #
Variant 1 works in UV space, so the diamonds follow the surface of the model. Variants 2 and 3 work in screen space, from gl_FragCoord, so the circle and the stain spread from the center of the screen, whichever model is under it. For a car in the middle of the screen it looks like the color is blooming from the car, but the effect is not attached to the car. If you want it to be, you need a mask in object space.
Where it is used #
Classics Garage is a car configurator with studio lighting, mirror-like reflections and a layer of gamification. The color transition is what the person sees when they change the paint. The project page here has a video of the material.
Related projects
- Transition Material — Available to buy on Patreon
- Classics Garage — Classic car configurator with gamification